Motorcycle tyre pressures are important at any time but when you’re riding on track it’s vital you check them and set them correctly.
The right tyre pressure will help your bike handle better, optimise tyre wear and most important of all, keep you safe.
It doesn’t matter if you’re a racer on slicks or a novice on a road bike; checking your pressures and knowing what to run are vital.
The trouble is, tyre pressures can be a bit of a minefield at the best of times. Just searching for ‘motorcycle trackday tyre pressures’ brings up over 153,000 results in Google! A lot of those results are in forum threads that start off with someone asking for the best tyre pressure for track riding and they result twenty different answers (and often a huge slanging match).
SEE ALL OF OUR MOTORCYCLE TRACKDAY TYRES
So let’s start with the basics.
Should you check your pressures when the tyre’s cold or hot?

This depends on your setup. If you’re riding to a trackday and you don’t have tyre warmers, it makes sense to check your pressures when the tyres are cold. Get to the track, get yourself signed on and setup and then take a reading. It’s best to use the bike manufacturer’s recommended road settings or check the charts below to find your tyres and adjust to the cold pressures to start with. Take a few laps to build some heat into your tyres and at the end of your session, take your tyre pressures again as soon as you can when you’ve come back in. Make a note of your pressures and adjust them to the hot pressures in the table below.
If you’re running tyre warmers, it’s sensible to check your tyre pressures once your tyres are up to temperature. Top tip: overinflate your tyres before you turn your warmers on and then drop the pressures down accordingly. Otherwise if your pressures are too low and you have to add in cold air, this will affect the end temperature more than if you had to drop air out.
Some tyre manufacturers suggest a specific temperature you should heat your tyres to but not all tyre warmers have a temperature control, in which case just heat them up normally.
When you come in after your session, it makes sense to put your warmers back on as soon as you can. Some riders like to keep the warmers running but I prefer to just cover up the tyres with the warmers but I don’t switch them on. This lets the tyre cool down slower, which I think improves the tyre life, compared to a cycle of hot and cold. I then plug my warmers in the session before I’m due to go out.
Should you set pressures for the bike or the tyre?

If your tyres aren’t listed in the chart below, they’re probably not Sports or Track-focused tyres. That doesn’t mean you can’t ride with them on track, you absolutely can/
There will be a sticker on your motorcycle that shows the manufacturer’s recommended pressures. The first thing to mention here is that this label shows road pressures, not trackday pressures. Secondly, these pressures are what the manufacturer recommends for the bike with the the OEM tyres. Thirdly, these are one-size fits-all figures and it’s safe to say a few psi either way, depending on your preference is perfectly acceptable. After all, an 18-stone rider, on a bike fully loaded with luggage will work a tyre differently to a 10-stone commuter on the same bike.
This isn’t to say these pressures will be inaccurate when you switch tyre brands or change to a different tyre model (which most riders do, because most OEM tyres aren’t that good). This guide is useful, especially for road riders. If you’re at a petrol station air machine, your bike’s not feeling right and you need a bit of air in your tyres, no matter what tyres you’re running, the sticker on your bike (or the page in your owner’s manual) is a good reference.
On track the manufacturer’s suggested pressures are less accurate but still a good starting point for you if you’re running road-focused tyres and you’re not running tyre warmers either. When you come in from your first session, adjust your pressures while the tyres are still hot, to get to the figures shown in your bike’s manual.
Once you start to run tyres that are focused on track riding or you run tyre warmers, you need to find the recommended pressures from the tyre’s manufacturer and not the bike’s manufacturer.
RaceReady Tyre Warmers
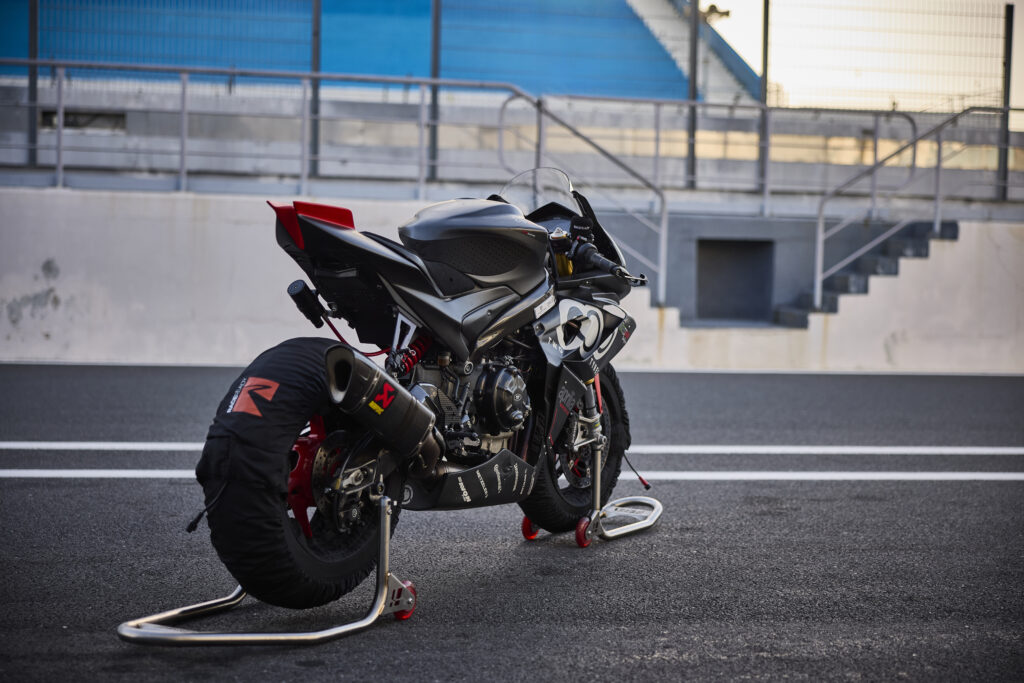
RaceReady tyre warmers are used in BSB and at the TT. They feature rim heaters; the same technology used by MotoGP teams. Designed to quickly, evenly and accurately heat your tyres. They are are digitally controlled, with temperature ranges from 30°C and 99°C. Elasticated edges ensure a secure and snug fit. The rim heaters help warm the tyres from the inside, providing a more even temperature spread throughout the carcass which reduces cold-tear and improves tyre wear. Check out the RaceReady Motorcycle Tyre Warmers here.
Factors that affect your tyre pressures

We think three important factors affect your tyre pressures and you need to consider these when on track.
Ambient temperature – This refers to the temperature of the air and the temperature of the track. If it’s cold outside and you set your pressures when the tyres are cold, by the time the tyre warms up to a certain temperature, the pressures in your tyre will be higher than if you had set your pressures from cold on a hot day. That is to say, as per Charles Law, if the volume of air in your tyre remains constant, then the pressure is directly proportional to the temperature. The lower the temperature, the lower the pressure inside the tyre, so you’ll need more air on a cold day and that air, when hot, will inflate the tyre more.
Secondly on a cold day, the track surface will be cold and won’t offer the same amount of grip as a hot surface and therefore the tyres won’t be generating as much heat by themselves as they would on a hot day. It’s a similar picture if it’s raining; your tyre will be generating heat but the water will be taking that heat away, meaning it’s hard to keep your trackday tyres in the right temperature window.
Total weight – Your tyres are pushed onto the tarmac by the weight of the bike and rider. The torque from your engine generates friction between the tyre and the tarmac and it’s this friction that generates grip – and heat! The heavier the load, the more friction that’s generated and the more heat there will be in the tyre. There’s also another factor and that’s how hard a bike works the tyre (different engine layouts and power outputs affect things somewhat) but a more influential factor is how a rider works a tyre. Some riders are silky smooth and others less so and this affects how hard a tyre is worked and how much heat it generates.
The tyre’s construction – This is also known as a tyre’s optimum temperature operating window. Road tyres are typically designed to work in less than optimum conditions; they have a wide operating window. They are also usually developed with compounds that work better in very cold conditions but not so well when it’s very hot.
This is is why on those occasional gloriously sunny days when you and your bike are working together as one, you might feel your tyres go a bit ‘greasy’ and that’s because you’re starting to work the tyre outside of its optimum temperature operating window. If you ride with touring tyres on track, you’ll experience this within a few laps.
Track specific tyres, from road-legal trackday tyres, right up to full-on slicks use different compounds to a road tyre and they’re designed for optimum grip and lap times but ONLY if you’re running them at the manufacturer’s recommended tyre pressures. Not only do they use different compounds but they also use different construction to road tyres, often firmer and a different profile. All of which are designed to be exploited in optimum conditions.
Motorcycle Trackday Tyre Pressures Chart
Listed below are all the manufacturer’s recommended tyres pressures for circuit riding. All pressures are in PSI, all temperatures are in degrees Celsius and all time is in minutes. F stands for Front tyre and R stands for Rear tyre. Where a manufacturer hasn’t listed a tyre warmer temperature and duration, it’s recommended you run your tyres in warmers for a minimum of 30 minutes.
Avon Motorcycle Trackday Tyre Pressures
| AVON 3D ULTRA XTREME SLICK (DISCONTINUED) | |||
|---|---|---|---|
| Tyre Size | Cold Pressure PSI | Hot Pressure PSI | Warmers Temp / Time |
| 120/70/17 | – | 32 -36 | 80 °C for 45 mins |
| 180/60/17 | – | 26 – 29 | 80 °C for 45 mins |
| 190/55/17 | – | 26 – 29 | 80 °C for 45 mins |
| AVON 3D ULTRA XTREME (DISCONTINUED) | |||
|---|---|---|---|
| Tyre Size | Cold Pressure PSI | Hot Pressure PSI | Warmers Temp / Time |
| 120/70/17 | 30 – 34 | 32 – 36 | 80 °C for 45 mins |
| 160/60/17 | 25 – 28 | 27 – 30 | 80 °C for 45 mins |
| 180/60/17 | 25 – 28 | 27 – 30 | 80 °C for 45 mins |
| 180/55/17 | 24 – 27 | 26 – 29 | 80 °C for 45 mins |
| 190/55/17 | 24 – 27 | 26 – 29 | 80 °C for 45 mins |
| AVON 3D SUPERSPORT | |||
|---|---|---|---|
| Tyre Size | Cold Pressure PSI | Hot Pressure PSI | Warmers Temp / Time |
| 120/70/17 | 32 | – | Not Required |
| 160/60/17 | 32 | – | Not Required |
| 180/55/17 | 31 | – | Not Required |
| 180/60/17 | 31 | – | Not Required |
| 190/55/17 | 30 | – | Not Required |
| 200/55/17 | 30 | – | Not Required |
Bridgestone Motorcycle Trackday Tyre Pressures
Bridgestone’s pressure recommendations depend on the track surface temperature and also your own feeling on how the bike is performing. Wet tyre track pressures need to be adapted depending on the amount of water on the track. Add around 0.5 psi if there is standing water on the track and remove 0.5 psi if the water is evaporating. Hot tyre pressures need to be taken as soon as you arrive in the pits after a session. For road tyres, the optimum operating temperature is lower and therefore when hot these tyres will degrade faster. When these tyres are used on the road, consult your motorcycle manufacturer’s manual for their recommended pressures.
| BRIDGESTONE V03 | |||
|---|---|---|---|
| Tyre Size | Cold Pressure PSI | Hot Pressure PSI | Warmers Temp / Time |
| 120/70-17 Front (Soft / Soft Medium) | 33 | 80 °C for 45 mins | |
| 200/60-17 Rear (Sprint / Soft / Medium | 27 | 80 °C for 45 mins | |
| BRIDGESTONE V02 | |||
|---|---|---|---|
| Tyre Size | Cold Pressure PSI | Hot Pressure PSI | Warmers Temp / Time |
| 90/580 R17 Front | 29 | 80 °C for 45 mins | |
| 120/600 R17 Rear | 29 | 80 °C for 45 mins | |
| 120/605 R17 Front | 34 – 35 | 80 °C for 45 mins | |
| 180/655 R17 Rear | 24 | 80 °C for 45 mins | |
| 200/660 R17 Rear | 24.5 | 80 °C for 45 mins | |
| BRIDGESTONE W01 & E08Z Wet | |||
|---|---|---|---|
| Tyre Size | Cold Pressure PSI | Hot Pressure PSI | Warmers Temp / Time |
| 90/580 R17 Front | – | 27.5 – 30.5 | 50 °C for 45 mins |
| 120/595 R17 Rear | – | 29 – 30.5 | 50 °C for 45 mins |
| 110/590 R17 Front | – | 27.5 – 32 | 50 °C for 45 mins |
| 140/620 R17 Rear | – | 29 – 32 | 50 °C for 45 mins |
| 120/600 R17 Front | – | 30.5 – 33.5 | 50 °C for 45 mins |
| 165/630 R17 Rear | – | 29 – 33.5 | 50 °C for 45 mins E08Z |
| 190/650 R17 Rear | – | 29 – 33.5 | 50 °C for 45 mins |
| BRIDGESTONE R11 | |||
|---|---|---|---|
| Tyre Size | Cold Pressure PSI | Hot Pressure PSI | Warmers Temp / Time |
| 110/70/17 | – | 30.5 | 80 °C for 45 mins |
| 140/70/17 | – | 29 | 80 °C for 45 mins |
| 150/60/17 | – | 29 | 80 °C for 45 mins |
| 120/70/17 | – | 32.5 | 80 °C for 45 mins |
| 160/60/17 | – | 29 | 80 °C for 45 mins |
| 180/55/17 | – | 26 | 80 °C for 45 mins |
| 190/55/17 | – | 25 | 80 °C for 45 mins |
| 200/55/17 | – | 24 | 80 °C for 45 mins |
| BRIDGESTONE RS11 | |||
|---|---|---|---|
| Tyre Size | Cold Pressure PSI | Hot Pressure PSI | Warmers Temp / Time |
| 120/70/17 | 30.5 | 35 | Not required |
| 190/55/17 | 26.5 | 33 | Not required |
| 200/55/17 | 24.5 | 33 | Not required |
| BRIDGESTONE RS12 | |||
|---|---|---|---|
| Tyre Size | Cold Pressure PSI | Hot Pressure PSI | Warmers Temp / Time |
| 120/70/17 | 30.5 | 33 | Not required but advise 80 °C for 45 mins |
| 180/55/17 | 26 | 30 | Not required but advise 80 °C for 45 mins |
| 190/55/17 | 26 | 30 | Not required but advise 80 °C for 45 mins |
| 200/55/17 | 25 | 29 | Not required but advise 80 °C for 45 mins |
| BRIDGESTONE CR11 | |||
|---|---|---|---|
| Tyre Size | Cold Pressure PSI | Hot Pressure PSI | Warmers Temp / Time |
| 110/80/18 | 30.5 – 33 | 36 | 80 °C for 45 mins |
| 150/65/18 | 26 – 30.5 | 34.5 | 80 °C for 45 mins |
| BRIDGESTONE S23 | |||
|---|---|---|---|
| Tyre Size | Cold Pressure PSI | Hot Pressure PSI | Warmers Temp / Time |
| 120/70/17 | 31 | 33.5 | Not Required |
| 160/60/17 | 29 | 34 – 35 | Not Required |
| 180/55/17 | 26 | 34 – 35 | Not Required |
| 190/50/17 | 26 | 34 -36 | Not Required |
| 190/55/17 | 26 | 34 – 36 | Not Required |
| 200/55/17 | 25 | 34 – 36 | Not Required |
| BRIDGESTONE S22 | |||
|---|---|---|---|
| Tyre Size | Cold Pressure PSI | Hot Pressure PSI | Warmers Temp / Time |
| 120/70/17 | 32 | 35 | Not Required |
| 180/55/17 | 26 | 33 – 36 | Not Required |
| 180/60/17 | 26 | 33 – 36 | Not Required |
| 190/50/17 | 26 | 34 – 36 | Not Required |
| 190/55/17 | 26 | 33 – 35 | Not Required |
| 200/55/17 | 24.5 | 33 – 35 | Not Required |
Continental Motorcycle Trackday Tyre Pressures

| CONTINENTAL CONTITRACK SLICK | |||
|---|---|---|---|
| Tyre Size | Cold Pressure PSI | Hot Pressure PSI | Warmers Temp / Time |
| 120/70/17 | 29 – 30.5 | 30.5 – 32.5 | 80 °C for 60 mins |
| 180/60/17 | 21 | 22.5 – 25 | 80 °C for 60 mins |
| 200/55/17 | 21 | 22.5 – 25 | 80 °C for 60 mins |
| CONTINENTAL RACE ATTACK RAIN | |||
|---|---|---|---|
| Tyre Size | Cold Pressure PSI | Hot Pressure PSI | Warmers Temp / Time |
| 120/70/17 | 30.5 – 33 | Max 35 | Not Required |
| 180/55/17 | 30.5 – 33 | Max 35 | Not Required |
| 190/55/17 | 30.5 – 33 | Max 35 | Not Required |
| CONTINENTAL RACE ATTACK 2 | |||
|---|---|---|---|
| Tyre Size | Cold Pressure PSI | Hot Pressure PSI | Warmers Temp / Time |
| 120/70/17 | 30.5 | 32.5 | 80 °C for 60 mins |
| 160/60/17 | 22 | Max 25 | 80 °C for 60 mins |
| 180/55/17 | 20 | Max 25 | 80 °C for 60 mins |
| 180/60/17 | 20 | Max 25 | 80 °C for 60 mins |
| 190/55/17 | 20.5 | Max 25 | 80 °C for 60 mins |
| 200/55/17 | 19 | Max 25 | 80 °C for 60 mins |
| CONTINENTAL RACE ATTACK 2 STREET | |||
|---|---|---|---|
| Tyre Size | Cold Pressure PSI | Hot Pressure PSI | Warmers Temp / Time |
| 120/70/17 | 32 – 33.5 | 35 – 36 | 80 °C for 60 mins |
| 180/55/17 | 29 | Max 34.8 | 80 °C for 60 mins |
| 190/50/17 | 29 | Max 34.8 | 80 °C for 60 mins |
| 190/55/17 | 29 | Max 34.8 | 80 °C for 60 mins |
| 200/55/17 | 29 | Max 34.8 | 80 °C for 60 mins |
| CONTINENTAL CONTISPORT ATTACK 4 | |||
|---|---|---|---|
| Tyre Size | Cold Pressure | Hot Pressure | Warmers Temp / Time |
| 120/70/17 | 31 – 32 | Max 35 | Not Required |
| 120/60/17 | 31 – 32 | Max 35 | Not Required |
| 160/60/17 | 32 | Max 38 | Not Required |
| 180/55/17 | 33 | Max 39 | Not Required |
| 190/50/17 | 33 | Max 39 | Not Required |
| 190/55/17 | 32 | Max 39 | Not Required |
| 200/55/17 | 32 | Max 39 | Not Required |
| CONTINENTAL ROAD ATTACK 2 CR AND 3 CR | |||
|---|---|---|---|
| Tyre Size | Cold Pressure PSI | Hot Pressure PSI | Warmers Temp / Time |
| 100/90/18 | 30.5 – 32 | – | Not Permitted in Class |
| 110/80/18 Front & Rear | 32 – 33 | – | Not Permitted in Class |
| 130/80/18 | 29 – 32 | – | Not Permitted in Class |
| 150/65/18 | 26 – 29 | – | Not Permitted in Class |
Dunlop Motorcycle Trackday Tyre Pressures
| DUNLOP KR106 AND KR108 SLICKS | |||
|---|---|---|---|
| Tyre Size | Cold Pressure PSI | Hot Pressure PSI | Warmers Temp / Time |
| 120/70R17 | 30.5 | 33 – 38 | 80 °C for 60 mins |
| 120/80R17 | 29 | 34.8 – 37.7 | 80 °C for 60 mins |
| 195/65R17 | 17.5 | 21.7 – 24.6 | 80 °C for 60 mins |
| 205/60R17 | 17.5 | 21.7 – 24.6 | 80 °C for 60 mins |
| 200/70R17 | 17.5 | 21.7 – 24.6 | 80 °C for 60 mins |
| DUNLOP GP RACER D213 GP PRO | |||
|---|---|---|---|
| Tyre Size | Cold Pressure PSI | Hot Pressure PSI | Warmers Temp / Time |
| 110/70/17 | 26 | 31.9 – 34.8 | 80 °C for 60 mins |
| 120/70/17 | 29 | 34.8 – 37.7 | 80 °C for 60 mins |
| 140/70/17 | 21 | 26 – 27.5 | 80 °C for 60 mins |
| 180/60/17 | 17.5 | 21.7 – 24.6 | 80 °C for 60 mins |
| 200/60/17 | 17.5 | 21.7 – 24.6 | 80 °C for 60 mins |
| DUNLOP GP RACER D212 SLICK | |||
|---|---|---|---|
| Tyre Size | Cold Pressure PSI | Hot Pressure PSI | Warmers Temp / Time |
| 120/70/17 | 30.5 | 35-36 | 80 °C for 60 mins |
| 190/55/17 | 14.5 – 16 | 20.5 – 23 | 80 °C for 60 mins |
| 200/55/17 | 14.5 – 16 | 20.5 – 23 | 80 °C for 60 mins |
| DUNLOP GP RACER D212 TREADED | |||
|---|---|---|---|
| Tyre Size | Cold Pressure PSI | Hot Pressure PSI | Warmers Temp / Time |
| 120/70/17 | 30.5 | 35-36 | 80 °C for 60 mins |
| 180/55/17 | 14.5 – 16 | 20.5 – 23 | 80 °C for 60 mins |
| 190/55/17 | 14.5 – 16 | 20.5 – 23 | 80 °C for 60 mins |
| 200/55/17 | 14.5 – 16 | 20.5 – 23 | 80 °C for 60 mins |
| DUNLOP SPORTSMART TT | |||
|---|---|---|---|
| Tyre Size | Cold Pressure PSI | Hot Pressure PSI | Warmers Temp / Time |
| 110/70/17 | 26-29 | 29 – 33 | 80 °C for 60 mins |
| 120/70/17 | 27.5 – 32 | 34.8 – 36.3 | 80 °C for 60 mins |
| 120/70/19 | 30.5 – 32 | 32 – 33.5 | 80 °C for 60 mins |
| 140/70/17 | 24.6 – 27.5 | 27.5 – 33.3 | 80 °C for 60 mins |
| 150/60/17 | 24.6 – 27.5 | 27.5 -33.3 | 80 °C for 60 mins |
| 160/60/17 | 24.6 – 27.5 | 27.7 -33.3 | 80 °C for 60 mins |
| 170/60/17 | 34.8 -36.3 | 39 – 42 | 80 °C for 60 mins |
| 180/55/17 | 21.7 – 27.5 | 26 – 34.8 | 80 °C for 60 mins |
| 180/60/17 | 21.7 – 27.5 | 26 – 34.8 | 80 °C for 60 mins |
| 190/55/17 | 21.7 – 27.5 | 26 – 34.8 | 80 °C for 60 mins |
| 200/55/17 | 21.7 – 27.5 | 26 – 34.8 | 80 °C for 60 mins |
Metzeler Motorcycle Trackday Tyre Pressures

| METZELER RACETEC RR SLICK | |||
|---|---|---|---|
| Tyre Size | Cold Pressure PSI | Hot Pressure PSI | Warmers Temp / Time |
| 120/70/17 | 30.5 – 32 | 32 – 36 | 80 °C for 50 mins |
| 125/80/17 | 30.5 – 32 | 32 – 36 | 80 °C for 50 mins |
| 180/60/17 | 23 – 26 | 25 – 27.5 | 80 °C for 50 mins |
| 190/60/17 | 23 – 26 | 25 – 27.5 | 80 °C for 50 mins |
| 200/60/17 | 23 – 26 | 25 – 27.5 | 80 °C for 50 mins |
| 200/65/17 | 23 – 26 | 25 – 27.5 | 80 °C for 50 mins |
| METZELER RACETEC SM | |||
|---|---|---|---|
| Tyre Size | Cold Pressure PSI | Hot Pressure PSI | Warmers Temp / Time |
| 125/75R420 | 26 – 28 | 23 – 26 | 80 °C for 40 mins |
| 125/75R17 | 26 – 28 | 23 – 26 | 80 °C for 40 mins |
| 165/55R17 | 22 – 23 | 23 – 25 | 80 °C for 40 mins |
| METZELER RACETEC SM RAIN | |||
|---|---|---|---|
| Tyre Size | Cold Pressure PSI | Hot Pressure PSI | Warmers Temp / Time |
| 125/75R420 | 34 | 35 | 50 °C for 30 mins |
| 125/75R17 | 34 | 35 | 50 °C for 30 mins |
| 165/55R17 | 28 | 29 | 50 °C for 30 mins |
| METZELER RACETEC TD SLICK | |||
|---|---|---|---|
| Tyre Size | Cold Pressure PSI | Hot Pressure PSI | Warmers Temp / Time |
| 120/70/17 | 30.5 – 32 | 32 – 36 | 80 °C for 50 mins |
| 180/55/17 | 23 – 26 | 25 – 28 | 80 °C for 50 mins |
| 180/60/17 | 23 – 26 | 25 – 28 | 80 °C for 50 mins |
| 190/55/17 | 23 – 26 | 25 – 28 | 80 °C for 50 mins |
| 200/55/17 | 23 – 26 | 25 – 28 | 80 °C for 50 mins |
| METZELER RACETEC RR INTERMEDIATE (DISCONTINUED) | |||
|---|---|---|---|
| Tyre Size | Cold Pressure PSI | Hot Pressure PSI | Warmers Temp / Time |
| 120/70/17 | 34 | 35 | 50 °C for 30 mins |
| 190/60/17 | 28 | 29 | 50 °C for 30 mins |
| METZELER RACETEC RAIN | |||
|---|---|---|---|
| Tyre Size | Cold Pressure PSI | Hot Pressure PSI | Warmers Temp / Time |
| 120/70/17 | 34 | 35 | 50 °C for 30 mins |
| 190/60/17 | 28 | 29 | 50 °C for 30 mins |
| METZELER RACETEC RR K1 & K2 | |||
|---|---|---|---|
| Tyre Size | Cold Pressure PSI | Hot Pressure PSI | Warmers Temp / Time |
| 120/70/17 | 29 – 32 | 30.5 – 35 | 80 °C for 50 mins |
| 160/60/17 | 23- 26 | 25 – 27.5 | 80 °C for 50 mins |
| 180/55/17 | 23- 26 | 25 – 27.5 | 80 °C for 50 mins |
| 180/60/17 | 23- 26 | 25 – 27.5 | 80 °C for 50 mins |
| 190/55/17 | 23- 26 | 25 – 27.5 | 80 °C for 50 mins |
| 200/55/17 | 23- 26 | 25 – 27.5 | 80 °C for 50 mins |
| METZELER RACETEC RR K3 | |||
|---|---|---|---|
| Tyre Size | Cold Pressure PSI | Hot Pressure PSI | Warmers Temp / Time |
| 120/70/17 | – | – | 80 °C for 50 mins |
| 160/60/17 | – | – | 80 °C for 50 mins |
| 180/55/17 | – | – | 80 °C for 50 mins |
| 190/55/17 | – | – | 80 °C for 50 mins |
| 200/55/17 | – | – | 80 °C for 50 mins |
| METZELER SPORTEC M9RR | |||
|---|---|---|---|
| Tyre Size | Cold Pressure PSI | Hot Pressure PSI | Warmers Temp / Time |
| 110/80/19 | 29 – 32 | 33 – 36 | Not Required |
| 110/70/17 | 27 – 30 | 31 – 34 | Not Required |
| 120/70/19 | 29- 32 | 33 – 36 | Not Required |
| 120/70/17 | 29- 32 | 33 – 36 | Not Required |
| 150/60/17 | 25 – 30 | 33 – 35 | Not Required |
| 160/60/17 | 26- 31 | 34 – 36 | Not Required |
| 170/60/17 | 29 – 34 | 37 – 39 | Not Required |
| 180/55/17 | 29 – 34 | 37 – 39 | Not Required |
| 180/60/17 | 29 – 34 | 37- 39 | Not Required |
| 190/50/17 | 29 – 34 | 37 – 39 | Not Required |
| 190/55/17 | 29 – 34 | 37 – 39 | Not Required |
| 200/55/17 | 29 – 34 | 37 – 39 | Not Required |
Michelin Motorcycle Trackday Tyre Pressures
| MICHELIN POWER PERFORMANCE SLICK | |||
|---|---|---|---|
| Tyre Size | Cold Pressure PSI | Hot Pressure PSI | Warmers Temp / Time |
| 120/70/17 | 30.5 | 33 – 36 | 80 °C for 60 mins |
| 190/60/17 | 18.9 | 23 – 26 | 80 °C for 60 mins |
| 200/60/17 | 18.9 | 23 – 26 | 80 °C for 60 mins |
| MICHELIN POWER PERFORMANCE CUP | |||
|---|---|---|---|
| Tyre Size | Cold Pressure PSI | Hot Pressure PSI | Warmers Temp / Time |
| 120/70/17 | 30.5 | 33 – 36 | 80 °C for 60 mins |
| 190/55/17 | 18.9 | 23 – 26 | 80 °C for 60 mins |
| 200/55/17 | 18.9 | 23 – 26 | 80 °C for 60 mins |
| MICHELIN POWER SLICK 2 | |||
|---|---|---|---|
| Tyre Size | Cold Pressure PSI | Hot Pressure PSI | Warmers Temp / Time |
| 120/70/17 | 30.5 | 34.8 | 80 °C for 60 mins |
| 190/55/17 | 22 | 24.7 | 80 °C for 60 mins |
| 200/55/17 | 22 | 24.7 | 80 °C for 60 mins |
| MICHELIN POWER RAIN | |||
|---|---|---|---|
| Tyre Size | Cold Dry PSI | Cold Wet PSI | Cold Soaking Wet PSI |
| 12/60/17 | 33 | 34.8 | 34.8 |
| 19/69/17 | 26 | 31.9 | 34.8 |
| MICHELIN POWER SUPERMOTO SLICK | |||
|---|---|---|---|
| Tyre Size | Cold Pressure PSI | Hot Pressure PSI | Warmers Temp / Time |
| 120/75R420 | 26 | 29 | 80 °C for 60 mins |
| 120/80/16 | 26 | 29 | 80 °C for 60 mins |
| 160/60/17 | 23 | 27.5 | 80 °C for 60 mins |
| MICHELIN POWER SUPERMOTO RAIN | |||
|---|---|---|---|
| Tyre Size | Cold Dry PSI | Cold Wet PSI | Cold Soaking Wet PSI |
| 120/75R420 | 33 | 34.8 | 34.8 |
| 120/80R16 | 33 | 34.8 | 34.8 |
| 160/60R17 | 26 | 31.9 | 34.8 |
| MICHELIN POWER CUP 2 | |||
|---|---|---|---|
| Tyre Size | Cold Pressure PSI | Hot Pressure PSI | Warmers Temp / Time |
| 120/70/17 | 30.5 | 34.8 | 80 °C for 60 mins |
| 180/55/17 | 22 | 24.7 | 80 °C for 60 mins |
| 190/55/17 | 22 | 24.7 | 80 °C for 60 mins |
| 200/55/17 | 22 | 24.7 | 80 °C for 60 mins |
| MICHELIN POWER GP2 | |||
|---|---|---|---|
| Tyre Size | Cold Pressure PSI | Hot Pressure PSI | Warmers Temp / Time |
| 120/70/17 | 30.5 | 34-35 | 80 °C for 45 mins |
| 160/60/17 | 27.5 | 32 – 35 | 80 °C for 45 mins |
| 180/55/17 | 27.5 | 32 – 35 | 80 °C for 45 mins |
| 190/55/17 | 27.5 | 32 – 35 | 80 °C for 45 mins |
| 190/50/17 | 27.5 | 32 -35 | 80 °C for 45 mins |
| 200/55/17 | 27.5 | 32 – 35 | 80 °C for 45 mins |
| MICHELIN POWER 6 | |||
|---|---|---|---|
| Tyre Size | Cold Pressure PSI | Hot Pressure PSI | Warmers Temp / Time |
| 120/70/17 | 30.5 | 34 – 36 | Not Required |
| 160/60/17 | 27.5 | 32 – 34 | Not Required |
| 180/55/17 | 27.5 | 33 – 35 | Not Required |
| 190/50/17 | 27.5 | 33 -35 | Not Required |
| 190/55/17 | 27.5 | 33 -35 | Not Required |
| 200/55/17 | 27.5 | 33 -35 | Not Required |
| MICHELIN POWER 5 | |||
|---|---|---|---|
| Tyre Size | Cold Pressure PSI | Hot Pressure PSI | Warmers Temp / Time |
| 120/70/17 | 30.5 | 34 – 36 | Not Required |
| 160/60/17 | 27.5 | 32 – 34 | Not Required |
| 180/55/17 | 27.5 | 33 – 35 | Not Required |
| 190/50/17 | 27.5 | 33 -35 | Not Required |
| 190/55/17 | 27.5 | 33 -35 | Not Required |
| 200/55/17 | 27.5 | 33 -35 | Not Required |
Pirelli Motorcycle Trackday Tyre Pressures
| PIRELLI DIABLO SUPERBIKE SLICK | |||
|---|---|---|---|
| Tyre Size | Cold Pressure PSI | Hot Pressure PSI | Warmers Temp / Time |
| 125/70/17 | 30.5 – 32 | 32 – 36 | 80 °C for 50 mins |
| 120/70/17 | 30.5 – 32 | 32 – 36 | 80 °C for 50 mins |
| 160/60/17 | 23 – 26 | 25 – 27.5 | 80 °C for 50 mins |
| 180/60/17 | 23 – 26 | 25 – 27.5 | 80 °C for 50 mins |
| 190/55/17 | 23 – 26 | 25 – 27.5 | 80 °C for 50 mins |
| 200/60/17 | 23 – 26 | 25 – 27.5 | 80 °C for 50 mins |
| 200/65/17 | 23 – 26 | 25 – 28 | 80 °C for 50 mins |
| PIRELLI DIABLO RAIN | |||
|---|---|---|---|
| Tyre Size | Cold Pressure PSI | Hot Pressure PSI | Warmers Temp / Time |
| 120/70/17 | 34 | 35 | 50 °C for 20 -30 mins |
| 160/60/17 | 28 | 29 | 50 °C for 20 -30 mins |
| 200/60/17 | 28 | 29 | 50 °C for 20 -30 mins |
| PIRELLI DIABLO SUPERCORSA V4 | |||
|---|---|---|---|
| Tyre Size | Cold Pressure | Hot Pressure | Warmers Temp / Time |
| 110/70/17 | 29 – 32 | 29 – 34 | 80 °C for 50 mins |
| 120/70/17 | 29 – 32 | 30 – 35 | 80 °C for 50 mins |
| 140/70/17 | 25 – 28 | 26 – 29 | 80 °C for 50 mins |
| 150/70/17 | 23 – 26 | 25 – 28 | 80 °C for 50 mins |
| 160/60/17 | 23 – 26 | 25 – 28 | 80 °C for 50 mins |
| 180/55/17 | 23 – 26 | 25 – 28 | 80 °C for 50 mins |
| 180/56/17 | 23 – 26 | 25 – 28 | 80 °C for 50 mins |
| 190/55/17 | 23 – 26 | 25 – 28 | 80 °C for 50 mins |
| 200/55/17 | 23 – 26 | 25 – 28 | 80 °C for 50 mins |
| 200/60/17 | 23 – 26 | 25 – 28 | 80 °C for 50 mins |
| PIRELLI DIABLO SUPERCORSA V3 SC (OK FOR V4SP and V3 SP) | |||
|---|---|---|---|
| Tyre Size | Cold Pressure | Hot Pressure | Warmers Temp / Time |
| 110/70/17 | 29 – 32 | 30 – 35 | 70-80 °C for 45 -50 mins |
| 120/70/17 | 29 – 32 | 30 – 35 | 70-80 °C for 45 -50 mins |
| 140/70/17 | 23 – 26 | 25 – 28 | 70-80 °C for 45 -50 mins |
| 150/70/17 | 23 – 26 | 25 – 28 | 70-80 °C for 45 -50 mins |
| 160/60/17 | 23 – 26 | 25 – 28 | 70-80 °C for 45 -50 mins |
| 180/60/17 | 23 – 26 | 25 – 28 | 70-80 °C for 45 -50 mins |
| 190/55/17 | 23 – 26 | 25 – 28 | 70-80 °C for 45 -50 mins |
| 200/55/17 | 23 – 26 | 25 – 28 | 70-80 °C for 45 -50 mins |
| 200/60/17 | 23 – 26 | 25 – 28 | 70-80 °C for 45 -50 mins |
| PIRELLI DIABLO ROSSO 4 CORSA | |||
|---|---|---|---|
| Tyre Size | Cold Pressure | Hot Pressure | Warmers Temp / Time |
| 120/70/17 | 31-32 | 34-36 | Not Required |
| 180/55/17 | 28 – 32 | 33- 36 | Not Required |
| 180/60/17 | 28 – 32 | 33 -36 | Not Required |
| 190/50/17 | 28 – 32 | 33 -36 | Not Required |
| 190/55/17 | 28 – 32 | 33 -36 | Not Required |
| 200/55/17 | 28 – 32 | 33 -36 | Not Required |
| 200/60/17 | 28 – 32 | 33 -36 | Not Required |
| PIRELLI ROSSO 4 | |||
|---|---|---|---|
| Tyre Size | Cold Pressure | Hot Pressure | Warmers Temp / Time |
| 120/70/17 | 31 – 32 | 35 -36 | Not Required |
| 160/60/17 | 28 – 32 | 33 -36 | Not Required |
| 180/55/17 | 28 – 32 | 33 -36 | Not Required |
| 190/55/17 | 28 – 32 | 33 -36 | Not Required |
| 200/55/17 | 28 – 32 | 33 -36 | Not Required |
Grab one of our tyre pressure gauges – get a free neck tube!

We’ve developed these motorcycle specific tyre pressure gauges. Built with top quality components, they’re designed to make it easy to get on and off your valve without losing pressure, enabling you to get an accurate reading every time.
We use these exact gauges in our workshop on a daily basis. You can choose between the analogue motorcycle tyre pressure gauge and our digital motorcycle tyre pressure gauge.
They’re built to last and come with our 3-year guarantee. Plus we’ll give you a free neck tube and free postage!
Motorcycle Trackday Tyres FAQ
Do I have to use tyre warmers?
You don’t have to but we recommend you do.
For some road-legal track tyres, the manufacturers claim (boast?) thT you don’t need warmers. However, if you use tyre warmers, you can go out in full confidence that the tyres are ready to work. If you don’t use warmers you’ll have to gradually up your pace over a couple of laps to build heat in the tyres.
It’s not just about grip. A tyre that’s pre-warmed will wear better and be less likely to suffer from cold-tear. This is where the top of the tyre is hot and moves but the carcass remains cold and so the tyre tears. You can also put your tyres back into the warmers (with the power off) when you finish your session in order to slow down the rate at which the tyre cools, further improving its life.
Yes, you could go out on unwarmed race slicks and build heat in them but it’ll be significantly less hassle and far safer if you use warmers.
Do tyre warmers improve tyre life?
Yes, they prevent cold-tear and they reduce the rate at which a tyre cools if you wrap your (switched off) tyre warmers around your tyres at the end of each session. Rapid cooling and heating of tyres causes premature tyre wear.
Can I mix slicks with treaded tyres
You can and we have worked with racers who have done this but it’s rare that you would. On a trackday you can run what you like and ride for the conditions. However, if you are racing and the tyre choice is open, you might opt for a treaded front with a slick rear if the track surface is cold in order to give yourself more confidence in the opening laps. However, it’s hard to think of a situation where mixing treaded and slick tyres gives a clear advantage over sticking with one type.
My mate says Trackday Slicks are no good, is that right?
We have a fair few enquiries along these lines. Some of the manufacturers produce a ‘trackday slick’ which is different to a full-on race slick. These are essentially their stickiest road-legal tyres but with a slick outer, i.e. no tread.
The problem is that some riders claim these trackdays slicks aren’t any good. We have no idea why and we think it’s likely that most of it is just uninformed opinion / bravado / nonsense.
The reason that track day slicks are great is that they will have almost as much outright grip as a full-on race slick, they’ll cost a fair bit less, last a bit longer and, most important of all, they offer far more feel. If you are British Superbike pace, you’ll probably want a full-on slick. However, we have customers who have won club races on trackday slicks, like the Metzeler TD Slick and the Dunlop D212 GP Racer slicks.
So take what your mate’s saying with a pinch of salt. If you’re Fast group pace and you fancy trying a slick, a trackday slick is a great option.
